
使用 Hexo + Next + Algolia 搜索 搭建博客
title: blog-theme-fluid
date: 2020-03-09 20:33:18
categories:
- 其他教程
tags:
- blog
安装 Hexo
全局安装
$ npm install hexo-cli -g #282a2e |
创建项目
$ hexo init [folder] |
启动预览
$ hexo server 预览 |
新建页面
$ hexo new [layout] <title> |
安装 Next 主题
# 官网提供的是 旧版 链接,注意本文的发布日期再去官网对照 |
安装完成之后去站点配置文件,根目录/_config 选用 Next
theme: next |
配置菜单的 分类、标签
$ cd your-hexo-site |
修改菜单(Next 主题配置文件)
menu: |
使用
# --- |
安装 Algolia 搜索
此操作流程只在 Next 主题下测试
Algolia 搜索
NexT 内部提供 Algolia 的搜索功能,要使用此功能请确保所使用的 NexT 版本在 v5.1.0 之后。需要注意的是,仅仅将 next/_config.yml 中 algolia_search 的 enable 打开并不能让你使用 Algolia 搜索,你还需要使用对应的 Hexo-Algolia 插件 才能真正在博客页面中使用 Algolia 搜索。按照下面介绍的步骤操作即可完成 Algolia 搜索的安装。
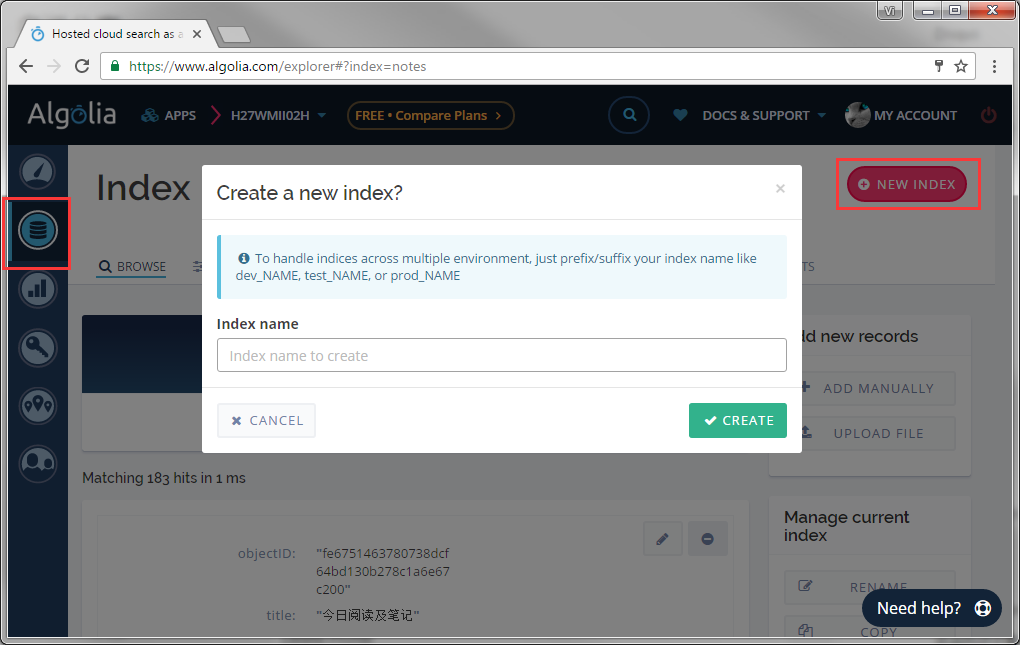
前往 Algolia 注册页面,注册一个新账户。 可以使用 GitHub 或者 Google 账户直接登录,注册后的 14 天内拥有所有功能(包括收费类别的)。之后若未续费会自动降级为免费账户,免费账户 总共有 10,000 条记录,每月有 100,000 的可以操作数。注册完成后,创建一个新的 Index,这个 Index 将在后面使用。

Index 创建完成后,此时这个 Index 里未包含任何数据。接下来需要安装 Hexo Algolia 扩展,这个扩展的功能是搜集站点的内容并通过 API 发送给 Algolia。前往站点根目录,执行命令安装:
$ cd hexo
$ npm install --save hexo-algolia
在
API Keys页面找到需要使用的一些配置的值,包括ApplicationID和Search-Only API Key。注意,Admin API Key需要保密保存,不要外泄。在
API Keys页面,点击ALL API KEYS找到新建 INDEX 对应的 key,编辑权限,在弹出框中找到 ACL ,勾选 Add records、 Delete records、List indices、Delete index 权限,点击update更新。
编辑
站点配置文件,新增以下配置,除了chunkSize字段,替换成在 Algolia 获取到的值:algolia:
applicationID: 'applicationID'
apiKey: 'apiKey'
indexName: 'indexName'
chunkSize: 5000当配置完成,在站点根目录下执行一下命令来更新上传 Index。请注意观察命令的输出。
$ export HEXO_ALGOLIA_INDEXING_KEY=Search-Only API key # 使用 Git Bash
# set HEXO_ALGOLIA_INDEXING_KEY=Search-Only API key # 使用 Windows CMD 命令行
$ hexo clean
$ hexo algolia
切换到 NexT 目录,并安装 algolia-instant-search 到
source/lib目录。$ cd themes/next
$ git clone https://github.com/theme-next/theme-next-algolia-instant-search source/lib/algolia-instant-search如果你想直接使用 CDN 设置 Algolia Search,则需要在
主题配置文件中添加 vendors 字段:vendors:
...
# Internal version: 1
# https://www.algolia.com
algolia_instant_js: https://cdn.jsdelivr.net/npm/instantsearch.js@2.4.1/dist/instantsearch.js
algolia_instant_css: https://cdn.jsdelivr.net/npm/instantsearch.js@2.4.1/dist/instantsearch.min.css
...更改
主题配置文件,找到 Algolia Search 配置部分,将enable改为true。同时你需要关闭其他搜索插件,如 Local Search 等。你也可以根据需要调整labels中的文本:# Algolia Search
algolia_search:
enable: true
hits:
per_page: 10
labels:
input_placeholder: Search for Posts
hits_empty: "We didn't find any results for the search: ${query}"
hits_stats: "${hits} results found in ${time} ms"


已知的问题
- 考虑到 Algolia 免费账户的限制,目前 Hexo-Algolia 插件最新版本去掉了正文索引功能。
- Hexo-Algoliasearch 插件提供了正文索引功能,不过需要替换 NEXT 主题中的关键字。对于免费账户,
Record Too Big的问题同样存在。- 替换
source/js/algolia-search.js中所有的applicationID为appId - 替换
layout/_partials/head/head.swig中所有的applicationID为appId
- 替换
此文档在 /themes/nest/docs/ALGOLIA-SEARCH
看完以上文档,默认你以安装完 Algolia,接下来使用 Hexo-Algoliasearch
- 首先安装 Hexo-Algoliasearch
在站点配置文件
algolia: |
配置完成后运行
$ hexo clean |
配置好以上,Next的algolia搜索是没有内容搜索的,所以配置了上面的插件。
默认 algolia 搜索显示只有标题,关键词未高亮,所以开始了老本行工作。
- 打开配置文件
/themes/next/source/js替换以下内容
instantsearch.widgets.hits({ |
- 修改 css
/themes/next/source/css/main.styl
.algolia-hit-item-match |
- 微信
- 支付宝


